Posts

Helpful Life Hacks

Image
Helpful Life Hacks 1. Lint roller for glitter clean-up. Dealing with a glitter mess?  Use a lint roller to help remove glitter from furniture or the floor before it spreads and creates an even larger mess. 2. Use painter’s tape to hang frames that require 2 screws. Lay the tape on the back of the frame, and mark where the screws will need to go on the wall, to fit in the hardware. Using a level, place your tape on the wall.   Once your tape is right where you would like your picture, drill in your screws over the tape. Use wall anchors when a stud cannot be utilized.  Remove the tape Hang your picture on your perfectly positions screws and enjoy a job well done.  3. Save spent candle glass for a decorative touch to bathroom essentials. • Clean all of the wax out of the container and remove the label, using hot water and soap. • Put cotton balls, Q-tips or decorative soaps in your new glass jars. If you don't want the contents to be scene, just paint th...

Handmade DIY Christmas Poinsettias

Image
Danielle sent April 16 at 7:17 PM Handmade DIY Christmas Poinsettias I saw these huge poinsettias at a hardware store and I just thought they were the coolest things, but I did not want to spend $35 on one. With this fun holiday craft project, you can have a fun new decoration while saving some money. Giant Fabric Poinsettia Supplies: Red Felt (around 15 sheets) Green Felt (around 2-3 sheets) Heavy gauge Wire Glue gun Glue sticks Card stock 3ft Wooden dowel (1/2” Thick) Metallic pipe cleaners Scissors Wire cutter Duct tape Green Ribbon (optional) Instructions 1. Create templates & cut out pedals (bracts): Cut out 3 staggering sized tear drop shapes from your cardstock to use as templates for the flower pedals(bracts). (9”L x 4”W , 6”L x 3”W & 4 ¼ ”L x 3”W). Using your felt and templates, cut out 10 of the smallest and medium size pedals, and 14 of the largest size pedals. • For an extra touch you can cut out some green leaves using your medium pedal template. 2....

Personalized Easter Bunny Letters

Image
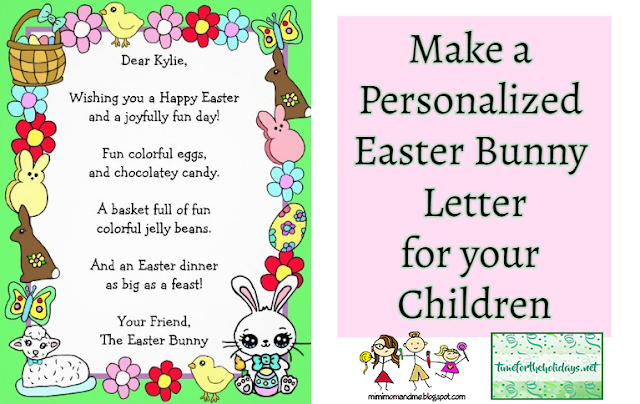
  How to Make a Custom Easter Bunny Letter Hey everyone! Thanks for stopping by our Mimi, Mom & Me blog! Easter is quick approaching. Today we will show you how to easily make a quick personalized letter for your kids from the Easter Bunny!  We have lots of different style Easter Bunny Letters, so whether you are looking for a cute letter or a religious letter, check out our Easter Bunny Letters Collection. We will list each step in making the Easter Bunny Letter and also put a video below in case that is an easier way to figure it out for you. 1. Click on this link:  Easter Bunny Letters Collection. 2. Choose which design you like and click on it. 3. Go to the Personalize This Template text on the right side and click on it. 4. A dropdown menu will come down where you can add your own custom text. You can add your child's name. You can also change the main text of the letter if you want or you can choose to just change the name and leave the letter context. 5. After ...

How to Make a Photo Keychain

Image
Custom Photo Keychains Are you wanting to carry around pictures of children everywhere you go? Or maybe you are looking for the perfect personalized gift for a daddy, grandma, aunt or uncle? Well, these photo keychains are simple to make and make really sweet sentimental gifts for someone! First, make a Zazzle account. Just go to Zazzle.com and make your account. Super fast and simple. Then just sign in and start making your keychain after watching the video below. Here is the link to the template to make it easier for you to create: Click Here to Create your Photo Keychain.  Also,  remember you can start your own Zazzle shop. You can  just make products for yourself, or you can add products to sell and make commission on! The  video below will show you how to make both options.  Here is a quick tutorial "how to" video. I hope that this video helps you. If you have questions post them below in the comments under this blog post or in the comments  under the ...

Making a Custom Photo Valentine's Day Card Tutorial

Image
  Valentine's Day Card Tutorial If you are wanting to make a personalized gift for your boyfriend, husband, girlfriend or wife, then a custom photo Valentine's Day card might be perfect for you. It's super easy using this card template . This card comes in many sizes and can be easily personalized.  Here is a quick two minute video that shows you how to easily add your own pictures and text to this Valentine's Day card. Black Faded Happy Birthday Add Your Photo Jumbo Card by TimefortheHolidays Jumbo Personalized 3 Photo Valentines Day "Card Card by TimefortheHolidays

Handmade Christmas Card Gift Tag and Ornament Tutorial

Image
Here is our latest video on how to make handmade Christmas card, gift tag and ornament. If you like the vintage Christmas loo like we do, then you might like this pretty DIY Christmas card tutorial. We made matching card, gift tag and ornament out of the cutest vintage holiday scrapbook paper. Down below is a list of all the products we used to make all of these adorable items. Video Tutorial is down below at end of post. If you try this let us know how yours turn out! Here's more pictures. Both sides of Gift Tag Inside of Card Both sides of Christmas Ornament  Visit our Etsy Shop https://www.etsy.com/shop/MimiMomandMe Products Used Crafter's Tape https://amzn.to/3a9pQNU Vintage Christmas Scrapbook Paper https://amzn.to/3486Ifp Hemp Twine https://amzn.to/3gHhXQM Wood Ornaments https://amzn.to/37f1ikv Glue Sticks https://amzn.to/3a6Skrq Cardstock https://amzn.to/3nhDwdc To and From Self Inking Stamp https://www.zazzle.com/to_and_from_gi... Mimi, Mom & Me...

Turning your Child's Artwork into a Card

Image
From Child's Artwork to Greeting Card Did you child draw a special drawing you would like to turn into a special keepsake? Well you can do it yourself on a site called Zazzle. We will give you step by step directions on how to do this. This is a fantastic gift for birthdays, Christmas, Father's Day or Mother's Day!  1. Click on this link to start making your card.  2. Now you are going to change the image on the front of the card and upload your child's art. Click on "Change Image 1."  3. If you don't like the placement of the picture or you want to center it, enlarge it or make it smaller you can click on, "Click to customize further." 4. Now it will take you to the template where you can make the picture bigger, smaller, fit to frame, center it or whatever you need to do to place it how you want it. Everywhere there is an arrow allows you to move the picture around or change the size. See the little squares? You can click on those and then pul...